

Part 4: How to Build a NextJS App using Typescript and TailwindCSS: The Complete Guide
Head and Script Tag of NextJS, ESLint in NextJS and Deploying a NextJS Application

I'm a UI/UX Designer and Full stack developer based in India. I'm currently a CSE undergrad at Cochin University of Science and Technology.
Hello Everyone 👋 I'm Abhinav Rajesh and I'm back with the 4th Part of the series "How to Build a NextJS App using Typescript and TailwindCSS: The Complete Guide" where we would be learning about ESLint and Head & Script Tag of NextJS, and Deploying the NextJS Applcation to Vercel.
I'm really sorry for the gap between the articles, got busy with hackathons(Adding link to articles on my hackathon projects In case you wanna check it out) and stuff in life.
Previous Parts of Series
- Part 1: Setting up NextJS with Typescript and TailwindCSS
- Part 2: Fetching and displaying data from API in NextJS using getStaticProps, TailwindCSS @apply directive and Typescript Interface.
- Part 3: Dynamic routing and API endpoints in NextJS
In the last article, we discussed about Dynamic routing and API endpoints in NextJS. In case you missed the article I would recommend checking them out first.
In this article we would be going through the following
- Adding meta tags with the help of
Headprovided by NextJS to optimize SEO of the pages. Scriptby NextJS- ESLint
- Deploying NextJS Application
Head
Head is a built-in component for appending elements to the head of the page. We can add stylesheets, JS Scripts, meta tags, custom title, etc.
Head is really useful for SEO optimization and to rank the website higher in google indexing.
In our example we would be adding multiple meta tags to improve the SEO of our project.
If you got to the chrome devtools and run the lighthouse tests for SEO, you would see something similar as below
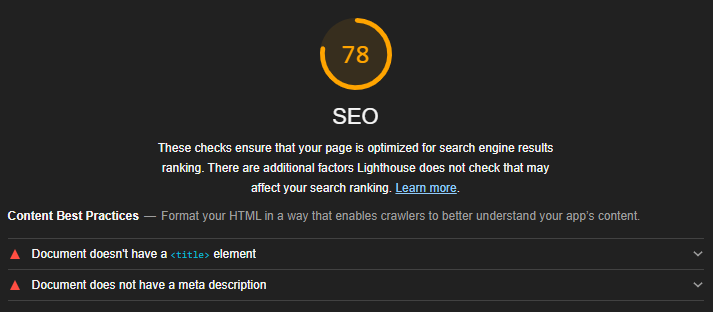
Now you may ask what's the use of title and description?
Title is really important for a page to be indexed at the top of the result. Learn More
The title gives screen reader users an overview of the page, and search engine users rely on it heavily to determine if a page is relevant to their search.
Description is as important as Title is. Learn More
Meta descriptions may be included in search results to concisely summarize page content
As this tutorial is just to make you understand what Head tag by NextJS does, I'm not diving deep into the SEO part. Would release an article on ranking higher in Google search index in coming future!
So, we would add title and description for out articles. To do that go to /pages/article/[id].tsx and change the Articlefunction to the following snippet
const Article = ({
  article,
}: InferGetStaticPropsType<typeof getStaticProps>) => {
  return (
    <div className="max-w-5xl mx-auto">
      <Head>
        <title>{article.title}</title>
        <meta name="description" content={`${article.body.slice(0, 140)}...`} />
      </Head>
      <Navbar />
      <div className="flex flex-col items-start justify-center mt-40">
        <h1 className="font-bold text-4xl capitalize mb-4">{article.title}</h1>
        <p className="text-xl">{article.body}</p>
        <Link href="/">
          <a className="py-2 px-4 bg-blue-600 hover:bg-blue-500 text-white rounded mt-4">
            Go Back
          </a>
        </Link>
      </div>
    </div>
  );
};
Here we have added Head tag inside the Article function and have added title and meta description tags. If you go to your browser and check the tab, you should see something similar
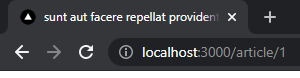
The title of the article acts as the title of the webpage! And if you inspect the page and check the head tag, you can see meta description tag too!

So from this example, we could understand that, whatever you input inside the Head component of NextJS, it gets injected to head tag of the page!
What if there are multiple Head tags?
NextJS handles multiple Head tags by itself. Just to be sure there are no duplicates we can add key prop in the meta tag. By default meta tags with duplicate names would automatically be handled by NextJS.
Similarly, we could add meta tags for our home and about page. This I would give as a practice for you to do, do try it out so you understand what it really does and let me know in the comments!
P.S. Also, create the about page for this application as a practice
Script
Previously to add script tags to your project, we would have to define script tag inside Head of NextJS in you page.
But since NextJS v11, NextJS comes with a Script component. The Script component enables developers to set the loading priority of third-party scripts to save developer time and improve loading performance.
There are 3 loading priorities for the scripts:
beforeInteractive: These are used critical scripts that need to be fetched and executed before the page is interactive, such as bot detection and consent management. These scripts are injected into the initial HTML from the server and run before self-bundled JavaScript is executed.
afterInteractive: This mode is set as default if you do not specify strategy. These are the scripts that can fetch and execute after the page is interactive, such as tag managers and analytics. These scripts are injected on the client-side and will run after hydration.lazyOnload: These are for scripts that can wait to load during idle time, such as chat support and social media widgets. (Chat widgets such as Chatbotish)
However, we won't be using Script component by NextJS for this application because we do not have any external scripts to load. But, here is a small example taken from the NextJS Documentation
import Script from 'next/script'

export default function Home() {
  return (
    <>
      <Script strategy="afterInteractive" src="https://www.google-analytics.com/analytics.js" />
    </>
  )
}
Also an important point to note
next/scriptmust not be placed in either anext/headcomponent or in pages/_document.js.
And this brings us to the last section of this series
ESLint in NextJS
It is a tool that analyzes source code to flag programming errors, bugs, stylistic errors, and suspicious constructs.
Since version 11.0.0, Next.js provides an integrated ESLint experience out of the box.
You just have to run yarn lint. It would throw any warning or errors present and fixing them accordingly is best practice. In this application if you run the command, there should not be any warning or errors as we are following best practices :)
Deploying the Application!
Vercel and Netlify are the best platform to deploy any react application.
For this tutorial I chose Vercel because the easiest way to deploy Next.js to production is to use the Vercel platform from the creators of Next.js! Also it automatically deploys from Github repository whenever a new commit is made.
Before this add your code to Github and create a repository and add the code to it.
Then Head over to https://vercel.com and create an account if you don't have an account already.
Once you are in the dashboard, click on New Project. Connect your Github Account with vercel.
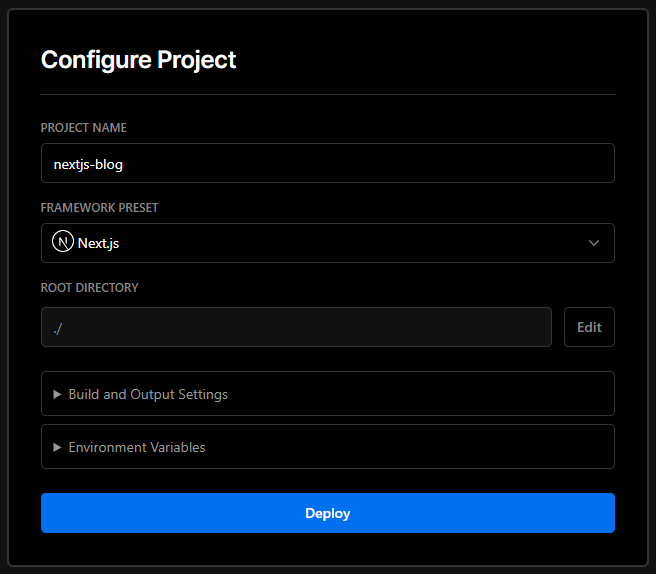
Choose the repository where your code is. In my case it's nextjs-blog. Click on import

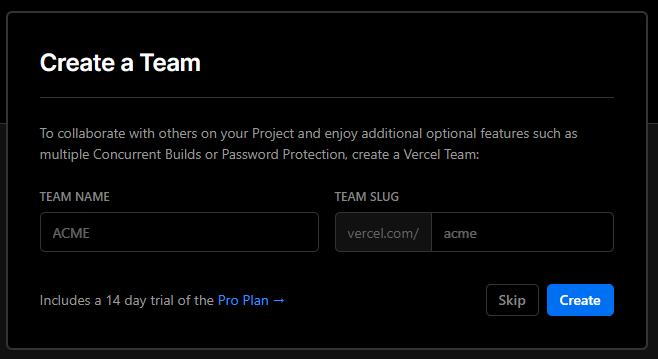
On the next screen, click on Skip for when it asks for Creating a Team
Click on deploy and your application would be deployed! 🎉
Uh Oh! If you check the build, it probably would have failed. It's because, we are trying to statically generate a the page using the data from the endpoint which is currently not deployed. Hence, the error. To fix this, we have to change all the statically generated pages (Home and Article Page) to be Server side rendered (Change all the types of getStaticProps and getStaticProps to types of getServerSideProps to getServerSideProps respectively).
I would recommend you to do this by yourself to understand how these works.
Once you have tried on your own, cross-check with the code snippets below. The /pages/articel/[id].tsx should look something like below snippet
// pages/articles/[id].tsx

import { GetServerSideProps, InferGetServerSidePropsType } from "next";
import Link from "next/link";
import Head from "next/head";

import { API_URL } from "../../constants";
import { Articles } from "../../types";

import Navbar from "../../components/Navbar";

const Article = ({
  article,
}: InferGetServerSidePropsType<typeof getServerSideProps>) => {
  return (
    <div className="max-w-5xl mx-auto">
      <Head>
        <title>{article.title}</title>
        <meta name="description" content={`${article.body.slice(0, 140)}...`} />
      </Head>
      <Navbar />
      <div className="flex flex-col items-start justify-center mt-40">
        <h1 className="font-bold text-4xl capitalize mb-4">{article.title}</h1>
        <p className="text-xl">{article.body}</p>
        <Link href="/">
          <a className="py-2 px-4 bg-blue-600 hover:bg-blue-500 text-white rounded mt-4">
            Go Back
          </a>
        </Link>
      </div>
    </div>
  );
};

export const getServerSideProps: GetServerSideProps = async (context) => {
  const res = await fetch(`${API_URL}/articles/${context.params!.id}`);
  const article: Articles = await res.json();

  return {
    props: {
      article: article,
    },
  };
};

export default Article;
And edit the index.tsx as follows
import { InferGetServerSidePropsType } from "next";
import { Articles } from "../types";

import Navbar from "../components/Navbar";
import Article from "../components/Article";
import { API_URL } from "../constants";

export default function Home({
  articles,
}: InferGetServerSidePropsType<typeof getServerSideProps>) {
  return (
    <div className="max-w-5xl mx-auto">
      <Navbar />
      <div className="grid grid-cols-1 md:grid-cols-2 space-x-5 space-y-5">
        {articles?.map((article) => (
          <Article
            body={article.body}
            id={article.id}
            title={article.title}
            userId={article.userId}
            key={article.id}
          />
        ))}
      </div>
    </div>
  );
}

export const getServerSideProps = async () => {
  const articles: Articles[] = await (
    await fetch(`${API_URL}/articles`)
  ).json();

  return {
    props: {
      articles,
    },
  };
};
Now, if you visit the deployed page you would most probably see a blank page. Now why is that? Remember we setup API_URL in the previous article? We need to to add the domain in the constants.ts file.
To get the url for the deployed version, go to the project and copy the one present here

const __prod__ = process.env.NODE_ENV === "production";

export const API_URL = __prod__ ? "https://REPLACE_WITH_THE_DOMAIN_IN_DASHBOARD" : "http://localhost:3004/api";
Then, push the changes to github and you are good to go!
Similarly, you may also deploy to Netlify , it's also an amazing hosting provider.
As always, linking the Github Repository.
Wrapping up the series
This was the final article of this series and I had lot of fun creating this. And I apologize for the delay of this article but I'm pretty sure you guys would have a fair amount of idea on NextJS, TailwindCSS and TypeScript. In case you feel any difficulty, feel free to contact me through comments or from my social accounts which I'm linking at the end of this article.
Support 🙌
If you're enjoying my articles, consider supporting me with a coffee ☕️ or upvoting the articles. It really motivates me to keep going.

Lets connect 🌎
Feedback 🎸
Feedback helps to improve my articles. I'd love to hear feedback and thoughts on the article. Looking forward to your views.


