

Part 1: Complete guide on creating a Discord bot with TypeScript using discord.js
Setting up project and installing required dependencies for the tutorial

I'm a UI/UX Designer and Full stack developer based in India. I'm currently a CSE undergrad at Cochin University of Science and Technology.
Hello everyone 👋 I'm Abhinav Rajesh and I'm back with another series. And in this series, we would be learning how to create a discord bot using typescript with the help of discord.js package. We would also be using Hashnode API!
We would be building out a simple discord bot that would return the user profile stats by fetching the data from hashnode API when we enter a certain message such as ?hashnode or ?hashnode <username>
So let's get started!
Prerequisites
- Any code editor of your choice
- No prior knowledge of TypeScript or JavaScript (Though knowing a bit before following the tutorial is a good idea to help you understand better)
- Device with Nodejs installed (v16.9.1 is what I'm gonna be using for this tutorial)
Introduction
What is discord.js ?
It is a powerful Node.js module that allows you to interact with the Discord API very easily. It takes a much more object-oriented approach than most other JS Discord libraries, making your bot's code significantly tidier and easier to comprehend.
Usability, consistency, and performance are key focuses of discord.js, and it also has nearly 100% coverage of the Discord API. It receives new Discord features shortly after they arrive in the API.
What is TypeScript ?
TypeScript is a popular language created and maintained by Microsoft. It’s a superset of JavaScript, which makes all its features optional.
You can convert your existing JavaScript app to TypeScript and it should work as expected as long as your code is valid JavaScript. TypeScript allows you to set types on your variables and functions so you can type-check your code statically and catch errors at compile time.
You can also use modern features that are not yet supported in JavaScript.
Setting up the project
NOTE: I would link the source code required for this project at the end of this article, but I would suggest you to follow along for better understanding
Create a folder and inside the folder, open up the terminal and type out the below snippet
npm init -ynpm initinitializes a project and createspackage.jsonfile and-yflag means "yes" to all default options. The generated file should look something similar to this// package.json { "name": "hashnode-bot", "version": "1.0.0", "description": "A discord bot to reply with stats of a user according to the user name", "main": "index.js", "scripts": { "test": "echo \"Error: no test specified\" && exit 1" }, "keywords": [ "hashnode", "discord", "bot" ], "author": "Abhinav Rajesh", "license": "MIT" }You may edit the file with whatever values you want, but I would recommend you to not edit it and leave it as it is if you don't know much about it.
Installing the required dependencies
For this tutorial, we would be needing discord.js and also we would be needing few dev dependencies for setting up typescript with our project. We would also be needing
nodemonfor our project to make developing the bot easier. We would install the remaining dependencies as we progress further in the tutorial. Now to install the dependencies we use the following commandsInstalling TypeScript
# using npm
npm install --save-dev typescript
# or using yarn
yarn add -D typescript
We would also be needing types for node
# using npm
npm install --save-dev @types/node
# or using yarn
yarn add -D @types/node
We would also be needing nodemon as a dev dependency. So every time you make a change, you would have to restart the server. And this is not really good for us as a developer. So what nodemon basically does is whenever we make a change in a file and save, it restarts the server on it's own!
# using npm
npm install --save-dev nodemon
# or using yarn
yarn add -D nodemon
And finally, we would be installing discord.js
# using npm
npm install discord.js
# or using yarn
yarn add discord.js
Setting up scripts
Now, the thing is Nodejs cannot understand typescript and can only understand javascript. So we need to do something to compile the typescript code to javascript code. To do that we can add the following script to
package.jsonfile inside the"scripts"// package.json { ..., "scripts": { "watch": "tsc -w", } }Now when you run
npm run watchoryarn run watchwhat this script basically does is, it "watches" over the typescript files and convert them into javascript files insidedistfolder in your project.We need to add 2 more scripts, one is
startand another isdev. So yourpackage.jsonshould have the following scripts// package.json { ..., "scripts": { "watch": "tsc -w", "start": "node dist/index.js", "dev": "nodemon dist/index.js" }, }We would only be using the
startscript once we are completely done with the project, i.e, during the time of hosting the bot. Thedevscript would only be used during the development of the bot and would not be used in the production environment. It usesnodemon, which basically improves the developer experience as mentioned before.Creating a folder for typescript code
Inside the root of the project, create a folder
src, this is where the code for typescript goes in. Insidesrccreate a file nameindex.ts. This file would be the entry point for our application. For now, just add a simple console log in it just to test if the setup is working.console.log("Hello, World!")Testing out if everything works as intended
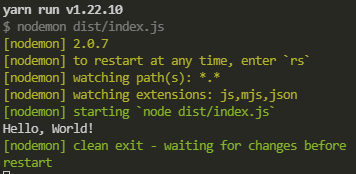
Now open up 2 terminals, one to watch for file changes and the other to convert all the typescript code to javascript code.
# In Terminal 1
# using npm
npm run watch
# or using yarn
yarn run watch
# In Terminal 2 # using npm npm run dev # or using yarn yarn run devAnd you should see something like this on the terminal
And that's it! 🥳 You are all set to follow along with this tutorial on creating a discord bot! Meet you in the second part of the series.
And as always, linking the GitHub repository with source code required for this article.
🙌 Support
If you're enjoying my articles, consider supporting me with a coffee ☕️. It really helps me a lot.

🌎 Lets connect
🎸 Feedback
Feedback helps to improve my articles. I'd love to hear feedback and thoughts on the article. Looking forward to your views.


